How to put your 360 VR Renders on Facebook by James Whitaker

Since experimenting with 360 videos last week, Facebook have now introduced 360 photographs and it turns out it is incredibly easy to produce and upload cg images, although it does require you to go through a couple of steps. So here is a little tutorial for anyone needing to create 360 content.

We use 3ds Max and V-Ray here at WS so the first part of this tutorial will describe the settings specific to our pipeline, but can be translated to other renderers. The second part will look at what you need to do to prepare your rendered image for upload to Facebook, regardless of software used.

Stage 1 - Render Settings

Set up your camera as you normally would.

Render settings are largely the same as your normal preferences, however under V-Ray > Camera select Spherical Panorama for type and check Override FOV, entering 360.0 for the horizontal override and 180.0 for the vertical override.

Finally, Facebook needs your image to be in a 2:1 ratio with the maximum recommended dimensions being 6000 wide by 3000 high.

Now you can hit render! We normally save out as 32-bit EXR with render passes and you can still do this, editing your image in Photoshop as you see fit before saving out as a jpg.

360 Image for Facbook created with 3DS Max and Vray

Stage 2 - EXIF editing

With your image rendered you now just need to add some additional information into the EXIF data so that Facebook interprets it as a 360 image rather than a normal flat 2D image.

For this you need to visit theexifer.net. Upload your image and then click eXif.me. Here we need to enter Ricoh for Camera Make and Ricoh Theta S for Camera Make. This will fool Facebook into believing that the image was taken with a recognised 360 camera.

Now you can download your photo with its corrected EXIF data and upload it to Facebook.

Further Reading

For anyone wanting some further reading here are a couple of helpful links:

Editing 360 Photos & Injecting Metadata - Facbook

Chaos Group guide to VR

Hechingen Film by James Whitaker

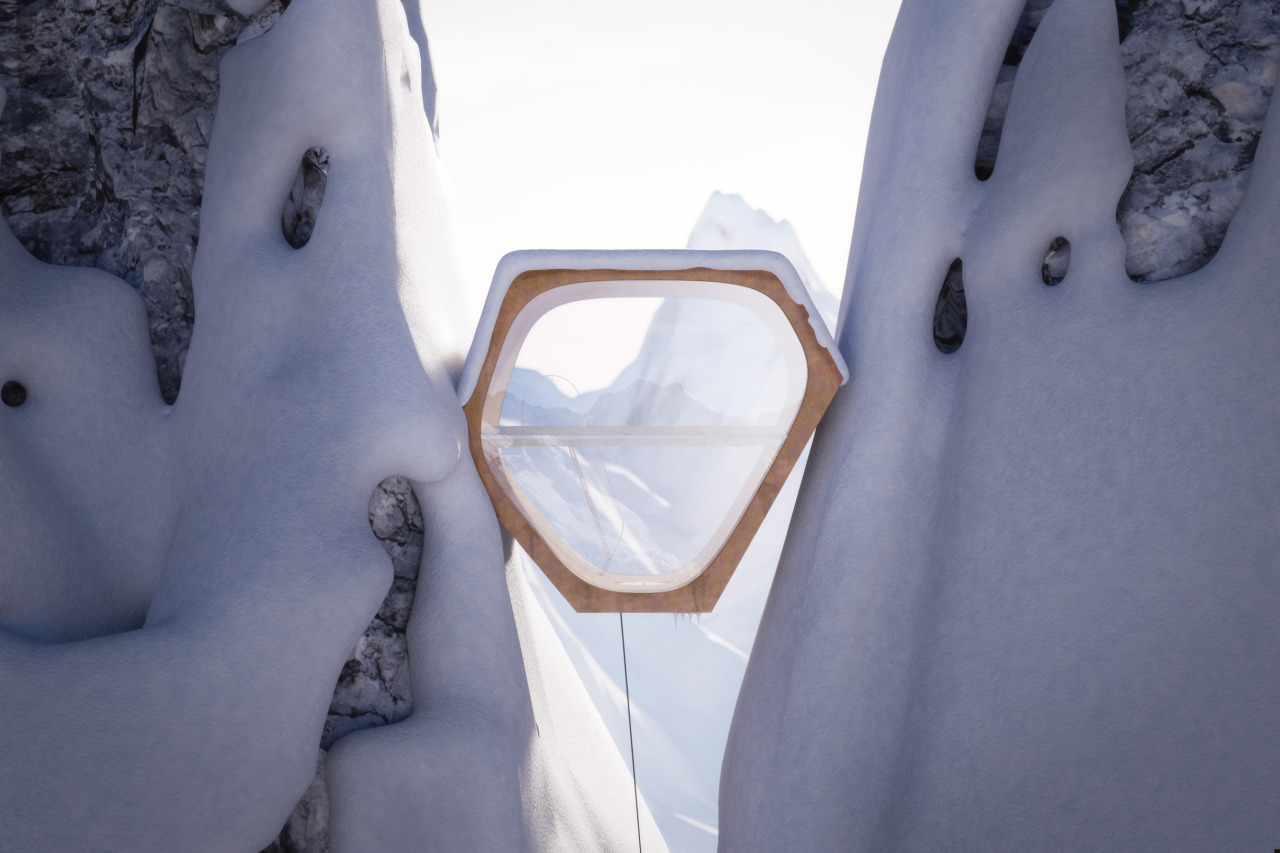
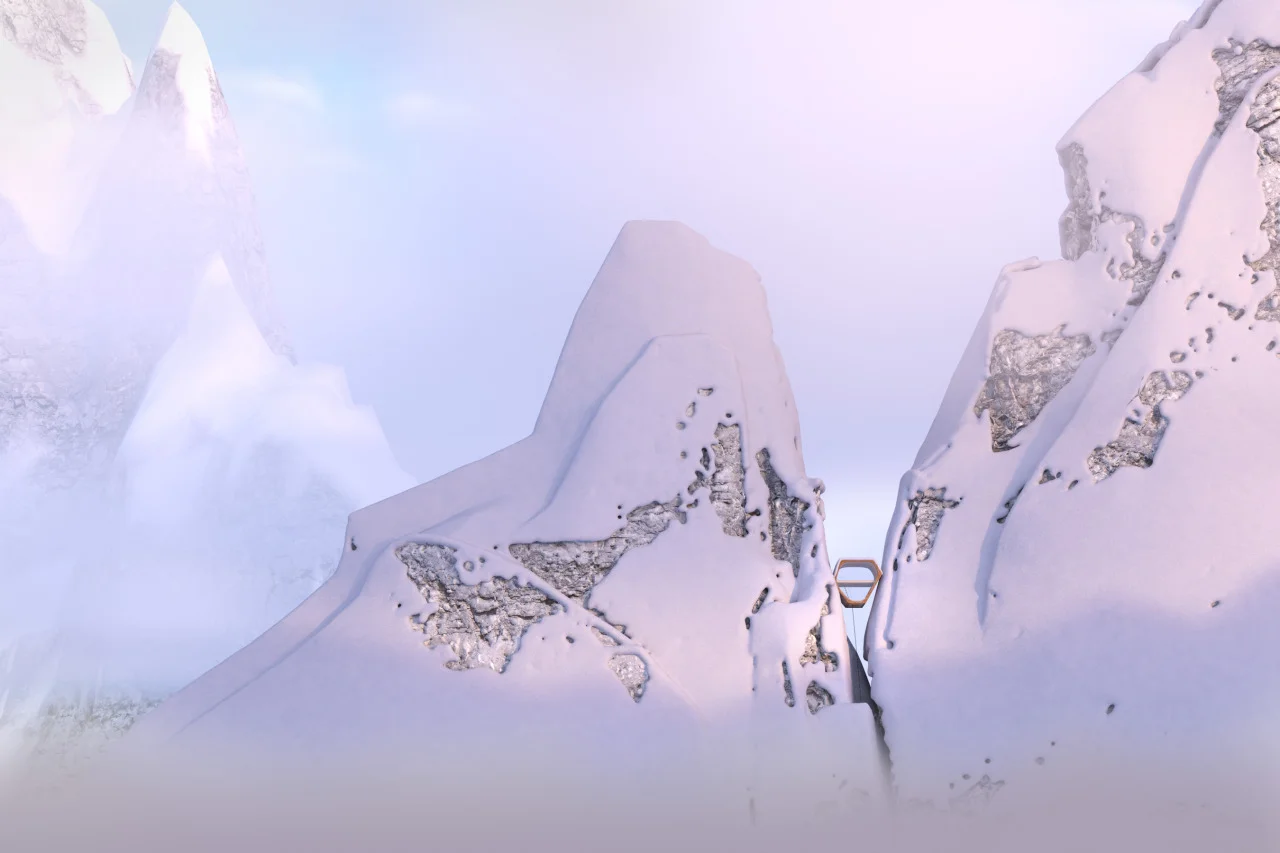
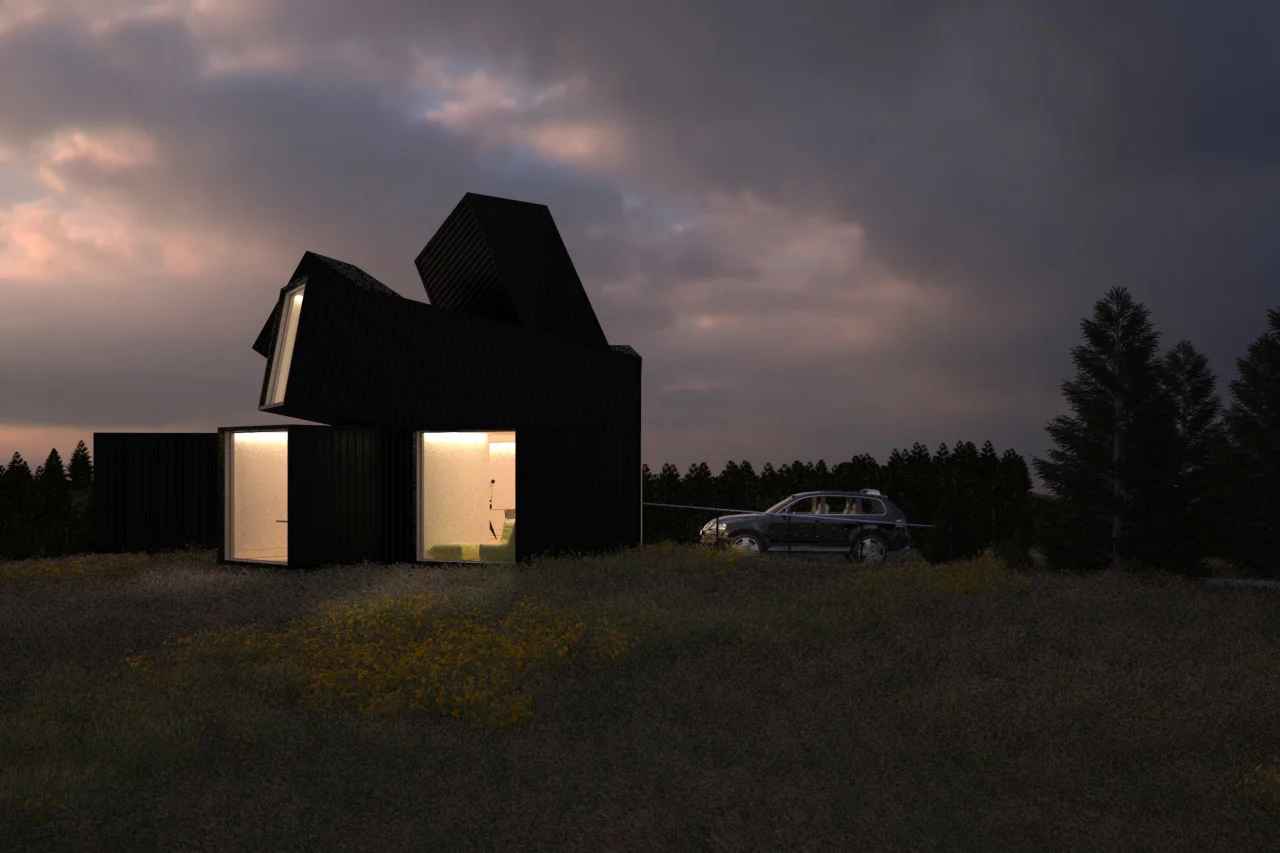
I'm delighted to present a short film that I've been working on recently - Hechingen Studio

Hope you enjoy it!

Someone once said to me that if you are going to make a jeans company concentrate on making a really good pair of jeans before you start selling t-shirts. I thought it was pretty good advice so I've been concentrating on stills up to now, making sure that they are as seductive and polished as can be. However when I was an undergraduate at uni I was a bit of a geek and used to teach animation on the post-graduate course. A couple of years ago I made a short film for fun with my brother and a bunch of friends and it went on to win a film festival in Canada. So we know a bit about making nice films. We approached this film in the same fashion as we would approach a live footage piece, working up a storyboard and then animatic, before editing and fine-tuning the shots, then we worked up the animation to what you see above.

For the geeky amongst you all animation and modelling was done in 3DS Max, rendering with VRay and post-production in Adobe. Rebus Farm was used to outsource some of the number crunching and the music was found on Musicbed. If you'd like to know any more feel free to ask in the comments section below.

You can read more about the building in this article on Dezeen.

New Team Member by James Whitaker

image.jpg

Louis had a bright future as a police sniffer dog until bad legs forced a career change. Now he 's Whitaker Studio's official office dog and beginning to learn 3DS Max (although the computer mouse is proving difficult).